![]()

SMART CAMERA; SOUNDBAR; MICROPHONE AND VIDEO SWITCHER
All-In-One Conferencing Solution
USER MANUAL
 |
 |
 |
 |
 |
INTRODUCTION
This product is an all-in-one meeting videobar with ultra-wide angle 4K camera, microphone and speaker, as well as wired and wireless screencasting capability. It is ideal for teleconference and collaboration applications in huddle rooms and small to medium meeting rooms.
FEATURES
- Smartvideo conference collaboration device. All-in-one solution for all meeting scenarios
- Wired screen presentation via USB-C and HDMI
- Wireless BYOD via Airplay, Miracast and Dongle
- Wide angle 4K video camera with 120° FOV
- 4x MEMS digital microphone arrays with a range of 5 — 8 meters and an angle of 180°
- 2x 5W Stereo full range speakers with passive radiator bass enhancement
- Includes AEC (Acoustic Echo Cancellation), AGC (Automatic Gain Control), ANS (Automatic Noise Suppression) and full duplex mode communication to make all participants feel like they are in the same room
- Auto Framing / Speaker Tracking / Presenter Tracking based on Al technology makes meetings more intimate and friendly
- Plug and play with excellent compatibility for OS and UC applications, e.g. Zoom, Teams, Webex, Tecent Meeting, etc.
- Provides flexible control options via Web GUI and Remote Controller
- Built-in Wi-Fi
PACKAGE CONTENTS
1x Video Bar
1x DC 24V 5A Power Adapter
1x Remote Controller
1x Magnetic Lens Cap
1x Wall Mounting Kit
4x Expansion Screws
4x Mounting Screws
SPECIFICATIONS
AUDIO AND VIDEO | |
Interface |
1x HDMI in, 1x HDMI out, 1x USB-C, 1x USB-B, 1x USB-A, 1x Mic, 1 x GE, 1x DC |
Video Resolutions |
4K@30Hz (Max) |
Output Video Encoding |
3840x2160 @ 30 Hz (max) |
CAMERA AND SENSOR | |
Lens |
Fixed Focus |
Sensor |
CMOS, Effective Pixel: 8.OM |
White Balance |
Auto |
Backlight Compensation |
Auto |
Digital Noise Reduction |
2D, ID Digital noise reduction supported |
Viewing Angle |
FOV: 120° |
ePTZ |
Supported |5x Digital Zoom |
HDR |
Supported |
Tracking Mode |
Auto Framing / Speaker Tracking / Presenter Tracking |
SPEAKERPHONE | |
Microphone |
4x Linear microphone arrays with echo cancellation Pick-up Range: 5m-8m |
Speaker |
2x 5W |
COMMUNICATION AND CONTROL | |
HDMI |
HDMI 2.0, HDCP 2.2 |
|
USB |
USB-C: USB 3.0 host (60W max charging) USB-A: USB 3.0 device USB-B: USB 3.0 host |
USB Protocol |
UAC, UVC, USB HID |
Ethernet |
1x RJ-45 |
WLAN |
IEEE 802.11 a/b/g/n/ac |
Control Method |
Web UI, Bluetooth Remote Controller |
GENERAL | |
Operating Temperature |
0°C ~ 45°C, 10% to 90%, non-condensing |
Storage Temperature |
-20°C ~ 60°C, 10% to 90%, non-condensing |
MTBF |
> 30000h |
Power Supply |
DC 24V SA |
Power Consumption |
100W (Max) |
|
Dimension (Width x Height x Depth) |
700mm x 126.83mm x 90mm (with Bracket) |
Net Weight |
2.42 kg (with Bracket) |
Gross Weight |
6.22 kg |
PANEL DESCRIPTION
ID |
NAME |
DESCRIPTION |
1 |
Speaker |
2x Speakers for audio signal output. |
2 |
Microphone |
4x Linear microphone arrays for picking up sound. |
3 |
Lens |
Camera lens. |
4 |
Status LED |
|
5 |
USB-C |
Connect to the Dongle for pairing. |
6 |
Pairing Button |
Press and hold this button for more than 2 seconds to start pairing with the bluetooth remote controller. |
7 |
USB-A |
USB 3.0 Type-A port. Connect to a USB device such as touch screen. |
8 |
USB-B |
USB 3.0 Type-B port. Connect to the room PC for meetings. |
9 |
USB-C |
USB 3.0 Type-C port. USB PD: 60W max Connect to the laptop for meetings. |
10 |
MIC |
Connect to an external microphone. |
11 |
Power |
Connect to the power adapter provided for DC 24V 5A input. |
12 |
HDMI Out |
Connect to a HDMI display dev1ce or a capture card of the room PC. |
13 |
HDMI In |
Connect to a laptop. |
14 |
Ethernet |
Connect to a network device (e.g. network switch, wireless router, computer, etc.) for Airplay Mirroring signal input and LAN control (Web GUI & Telnet API). |
15 |
|
Kensington security slot |

INSTALLATION
Note: Before installation, ensure the device is disconnected from the power source.
To install the device on the wall:
- Drill holes in the wall where appropriate, then insert the expansion screws provided into the wall. Secure the wall hanging bracket on the wall using the mounting screws provided.
- Remove the stand from the device.
- Screw the wall-mounted bracket to the device.
- Attach the device‘s wall-mounted bracket to the wall hanging bracket on the wall.
APPLICATIONS
1. BYOM
One Type-C AOC full function cable (optional) supports DP 1.4,USB 3.0,USB 2.0 and PD (max 6OW).
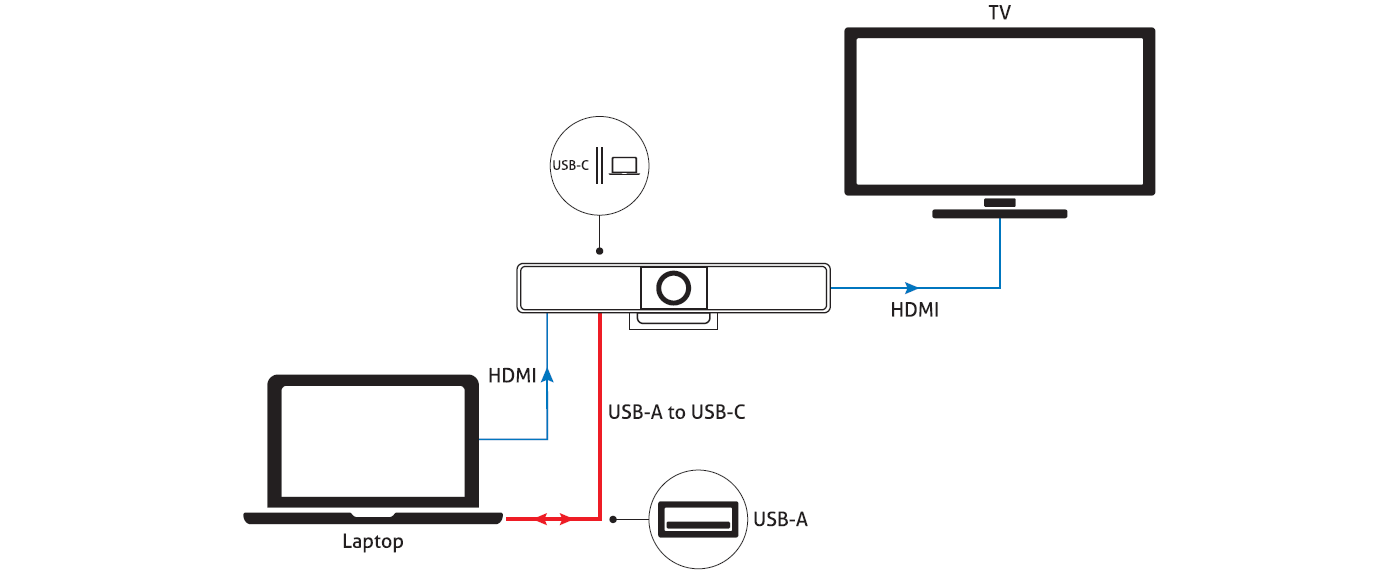
The second connection method is to use the standard HDMI and USB-A cables.
2. Zoom Room + BYOD

Dongle sold separately
Note: After the device is connected to a computer, it can be detected by the system and specific applications with the following name:
- Model: VB300
-
Camera / Speaker / Microphone: VB3OO
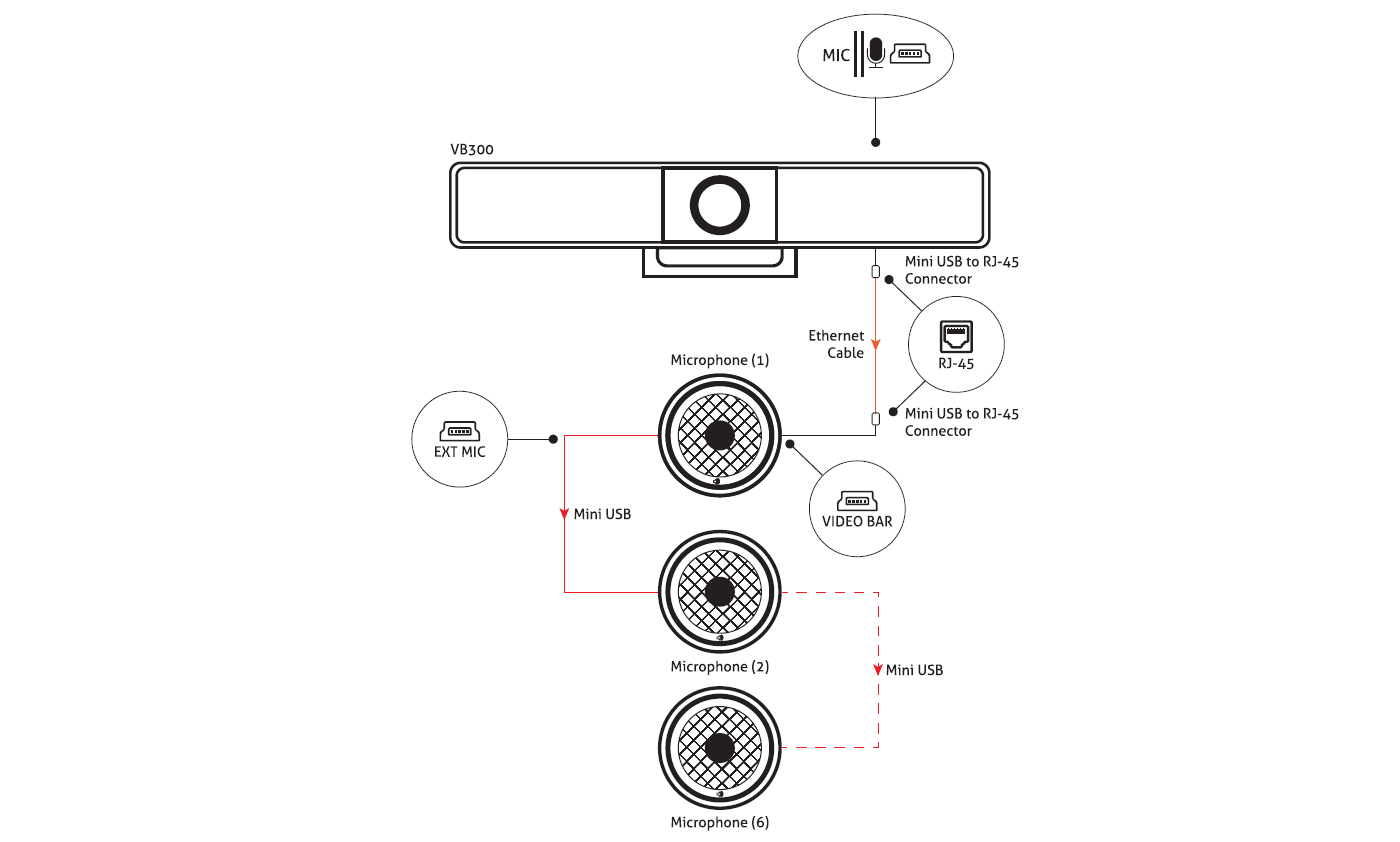
3. Microphone Cascading

AUTOMATIC SIGNAL SWITCHING
Automatic signal switching function allows you to easily and quickly choose a source.
- If screen display mode is set as Single Screen (default setting), signal switching follows Last-In-First-Out rule. In Single Screen mode, if a new video source inputs, the device will output it to the display screen.
- If two video sources are being played indual view (Split Screen), connect a new video source input to the device: when there's one hardware video source (HDMI/ USB-C) at most among three sources, the latest input source will replace the source that has been displayed the longest on the screen; or the latest input source will replace the previous hardware video source.
- If all video sources are removed, the device will output the Home Screen connection guide.
PAIRING WITH BLUETOOTH REMOTE CONTROLLER
The device can be controlled by the Bluetooth remote controller provided, after they have been successfully paired with each other.
To pair with the Bluetooth remote controller:
|
 |
|
The following briefly introduces the functions of the remote controller buttons.
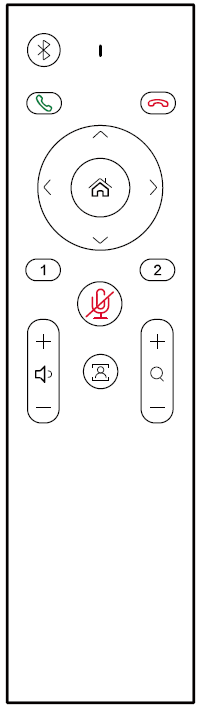 |
BUTTONS | DESCRIPTION |
|
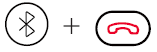
Bluetooth |
Press and hold the button for two seconds to make the device to start pairing with other third-party Bluetooth device. (This function will be available in further versions) | |
|
Answer |
Press to answer the phone (available only when connected to a cellphone via Bluetooth. | |
|
Hang up |
Press to hang up the phone (available only when connected to a cellphone via Bluetooth. | |
|
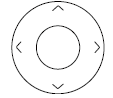
Home |
|
|
|
Navigation |
Press to perform ePTZ (only available when Tracking mode is off). | |
|
Presets |
|
|
|
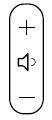
Mute / Unmute |
Press to toggle between mute and unmute. | |
|
Volume |
Press to adjust the volume. Press and hold to adjust the volume continuously. |
|
|
Tracking mode |
Press to toggle among Auto Framing, Speaker Tracking and Off. | |
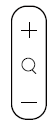 Zoom Zoom |
Press to adjust the zoom. Press and hold to adjust the zoom continuously. |
|
 |
Press and hold the combination buttons for 3 seconds, the remote controller will enter pairing mode. |


SCREEN MIRRORING
With screen mirroring support, the device allows users to share multimedia content wirelessly from their mobile devices on any HDMI displays over Windows, Airplay Mirroring and Miracast.
USING APPLE DEVICES
Step 1: Connect your iPhone/iPad/Mac to the network on which the device runs.
Step 2: Open Control Center on your Apple device, tap “Screen Mirroring” to select appropriate mirroring device from the pop-up menu.
Note: For Apple device screen casting, please use the remote control to control the volume of VB300.
USING ANDROID PHONES
Take Samsung Galaxy series for example:
Step 1: Enable the Wi-Fi or WLAN feature of your mobile device.
Step 2: On your mobile device, swipe down from the top and tap “Smart View” or “Wireless Projection” to select appropriate mirroring device from the pop-up CONNECT menu.
USING THE DONGLE
Pre-Step: Plug the Dongle in to type-C port on the side of VB300 for pairing.
Step 1: Plug the Dongle in to your PC or Laptop.
Step 2: Press the button to start casting once the LED stops flashing.
USING WINDOWS PCS
Step 1: Enable the Wi-Fi or WLAN feature of your PC.
Step 2: On your PC, press the combination keys “Windows + K” to select appropriate mirroring device from the pop-up menu.
WEB UI
The Web UI designed for this device allows for basic settings. It can be accessed through a modern browser, e.g. Chrome, Safari, Firefox, etc.
To access the Web UI page:
- Connect the Ethernet port of the device to a local area network. (Ensure there's a DHCP server in the network so that the switcher can obtain a valid IP address.)
- Connect a PC to the same network as the device.
-
Input the device's IP address in the browser and press Enter, the following window will pop up.
Note: Default IP mode for this device is DHCP.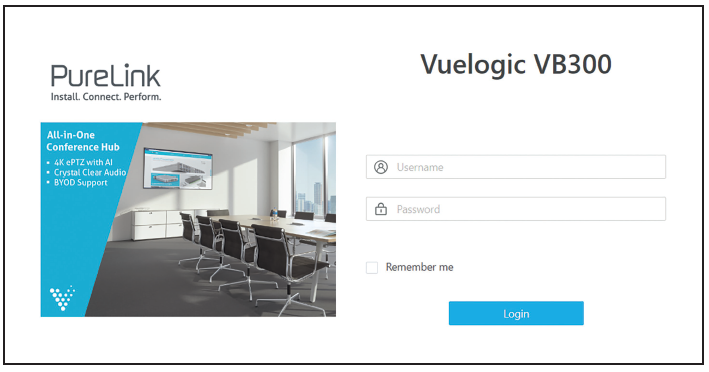
- Input the user name and password (default user name & password: admin) and click Login to enter the main page.
The main page includes Overview, Camera, Settings and Support tabs.
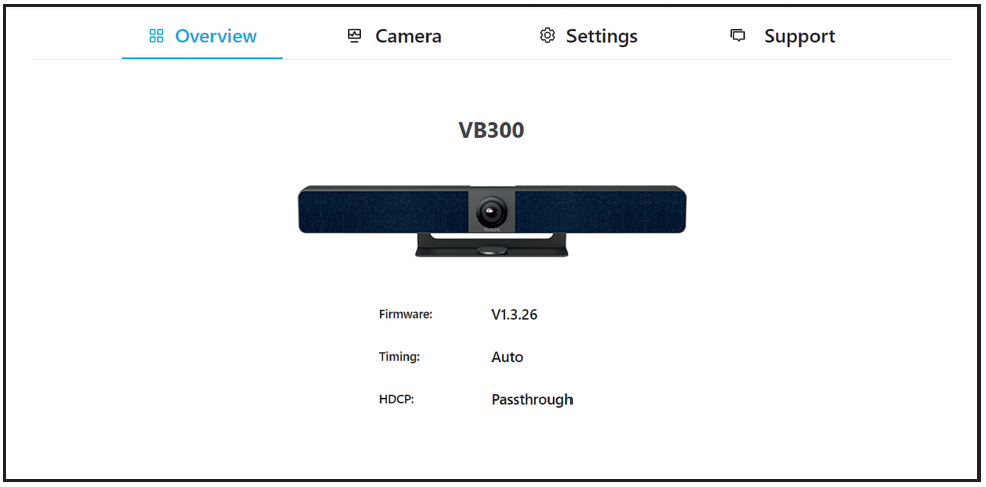
- Overview — offers basic information of the device.
- Camera— offers settings of camera parameters.
- Settings — offers basic settings of Video, Wi-Fi, BYOD, etc.
- Support — offers firmware updatefunction and deviceinformation.
OVERVIEW
This page offers firmware version and status of output timing and HDCP settings for thew device.
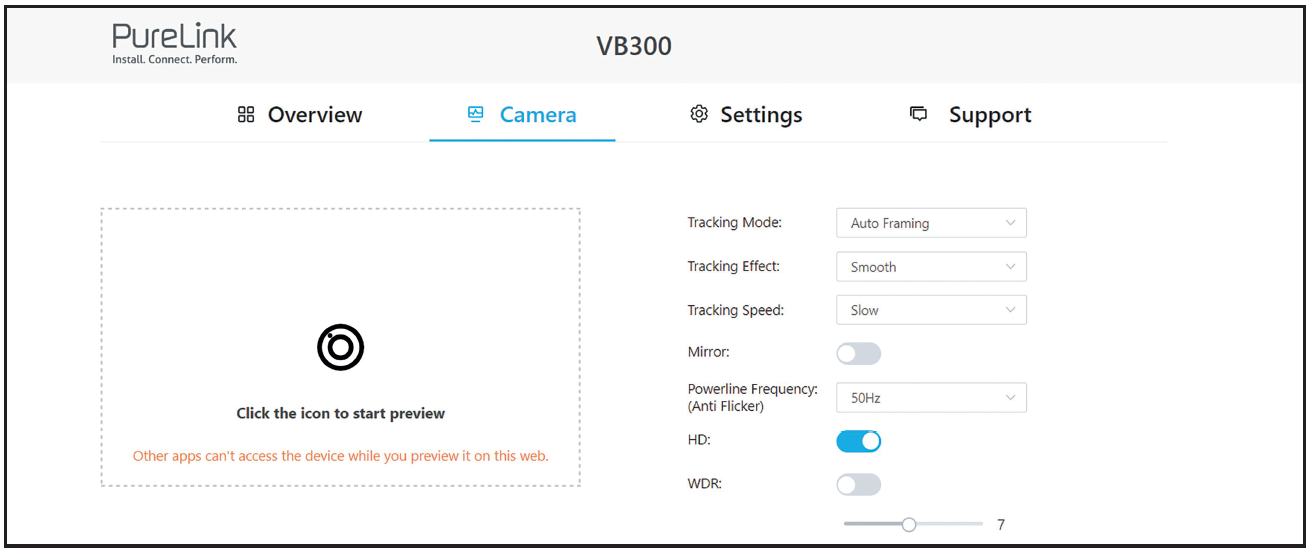
CAMERA
UI ELEMENTS |
DESCRIPTION/OPTIONS |
Tracking Mode |
|
Tracking Effect |
Tracking effect is available when Auto Framing is enabled.
|
Tracking Speed |
Tracking speed is available when Auto Framing is enabled.
|
Mirror |
|
Powerline Frequency (Anti Flicker) |
Change the frequency to prevent flicker in the video.
|
UI ELEMENTS |
DESCRIPTION/OPTIONS |
HD |
|
 |
Click this icon to enable camera preview. Note: Other Apps cannot use the camera until camera preview is disabled. |
WDR |
When WDR is enabled, you can manually adjust the Backlight compensation value. |
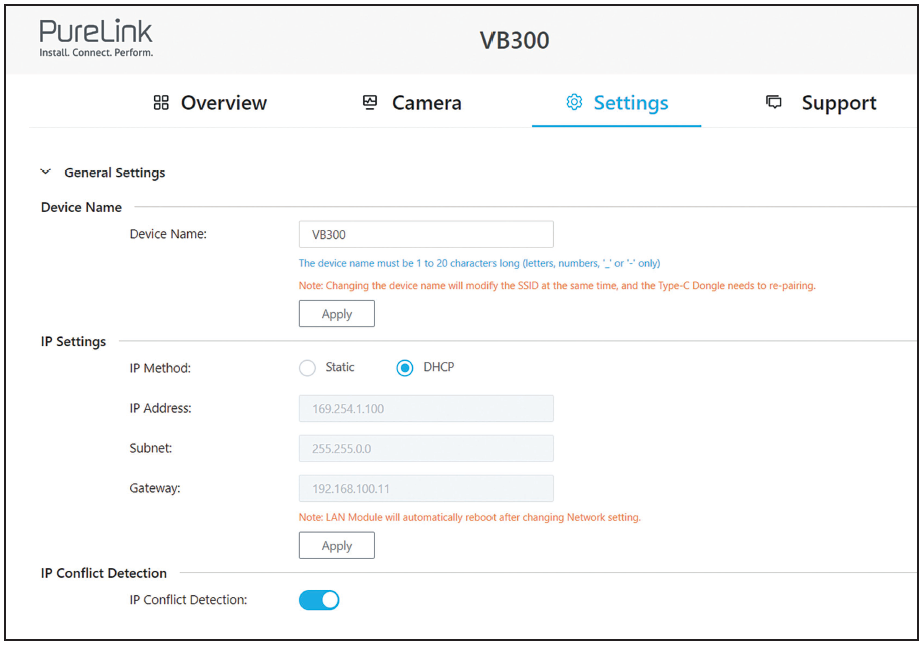
SETTINGS
GENERAL SETTINGS
UI ELEMENTS |
DESCRIPTION/OPTIONS |
Device Name |
Redefine the device name to an easy to remember one. Note: The name must be 1-20 characters in length, including letters, numbers, "_" or "-". By default, it‘s set as VB300.
|
IP Method |
Static / DHCP (default) |
IP Address |
Set IP address manually when Static mode is selected. |
Subnet |
Set subnet mask manually when Static mode is selected. |
Gateway |
Set gateway address manually for the device to communicate with another network that uses different communication protocols when Static mode is selected. |
Apply |
Click to save and perform above IP settings. (LAN module will reboot automatically once IP settings are changed. |
IP Conflict Detection |
When IP Conflict Detection is enabled, an OSD prompt is displayed when an IP address conflict is detected |
VIDEO SETTINGS
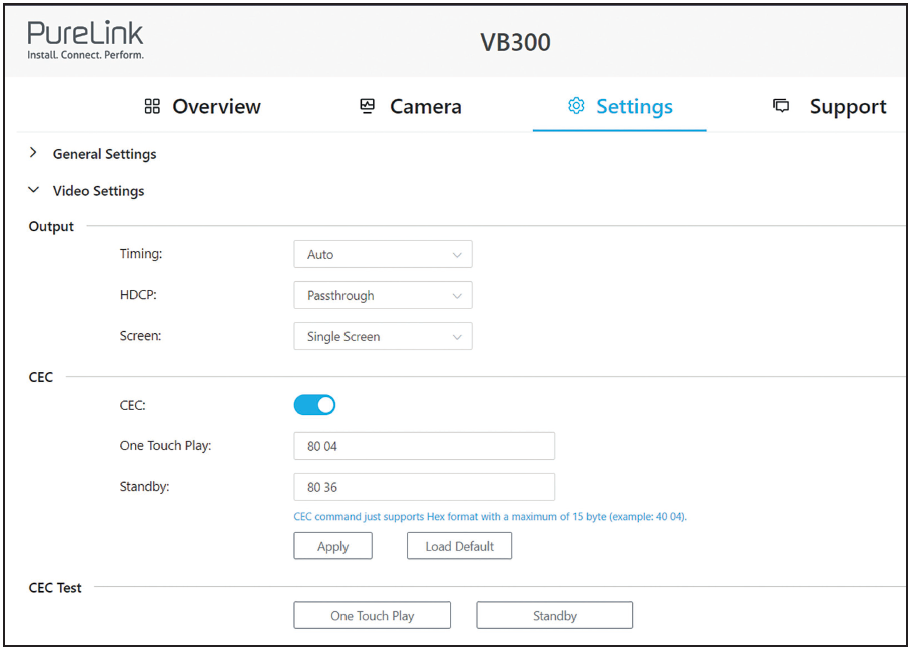
UI ELEMENTS |
DESCRIPTION/OPTIONS |
|
Timing |
Set output resolution for the device. Two options are offered:
|
HDCP |
Set HDCP capability for the device‘s output. Four options are offered:
|
Screen |
|
CEC |
On (default) / Off: Select to enable/disable CEC control. |
One Touch play |
Enter the CEC one touch play command in hex of the controlled display device. For more information about the command, see the user guide of your display device. By default, it‘s set as “80 04”. |
|
Standby |
Enter the CEC standby command in hex of the controlled display device. For more information about the command, see the user guide of your display device. By default, it‘s set as “80 36”. |
Apply |
Click to save and perform above settings. |
Load Default |
Click to load default settings. |
CEC Test |
One Touch Play/Standby: Click to test if command setting takes effect. |
WI-FI SETTINGS
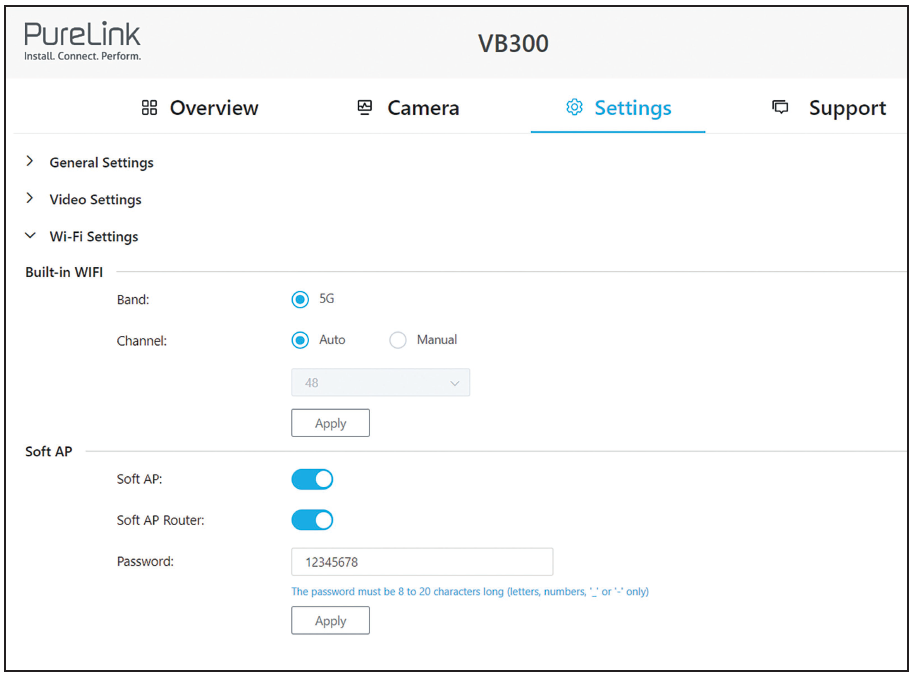
UI ELEMENTS |
DESCRIPTION/OPTIONS |
Band |
5G |
Channel |
|
Soft AP |
On (default)/Off |
Soft AP Router |
On (default)/Off |
Password |
Configure the soft AP password. |
Apply |
Click to save and perform above settings. |
Operation Frequency |
|
Maximum Power |
|
BYOD SETTINGS
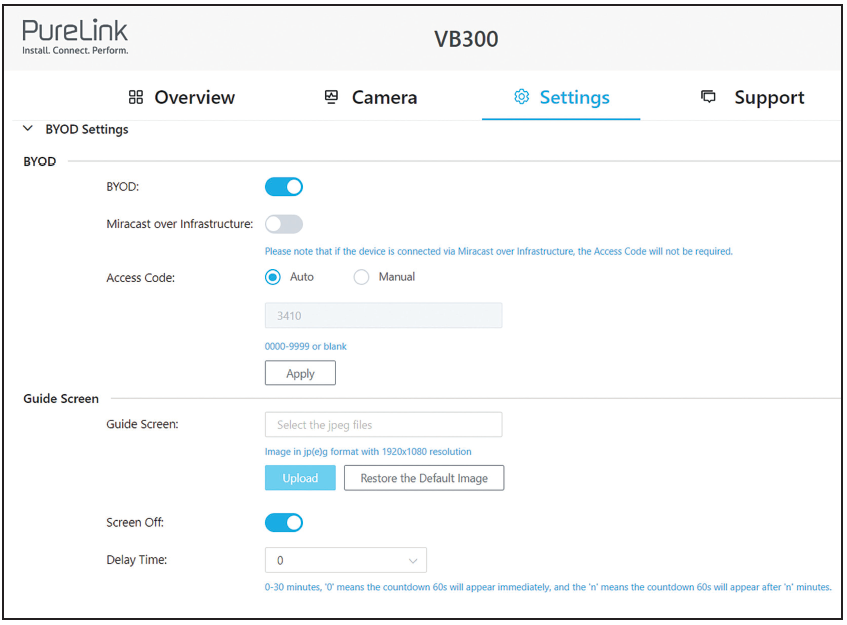
UI ELEMENTS |
DESCRIPTION/OPTIONS |
BYOD |
On (default)/Off |
Access Code |
The access code is used to help prevent users from accidentally connecting to an unintended device and protect from an unauthorized access. Auto: The device will randomly generate a four-digit access code in the following cases:
Manual: Select to input a four-digit code. Access Code ON by default. |
Apply |
Click to save and perform above settings. |
Guide Screen |
Click to select a Guide Screen image in .jpg format of 1920x1080 and upload to the device. |
Screen off |
Enable means that the screen will enter the countdown after the set time and then turn off. Disable means that the screen will never turn |
Delay time |
,0’ means the countdown 60s will appear immediately, and the ,n’ means the countdown 60s will appear after ,n‘ minutes. |
SYSTEM SETTINGS
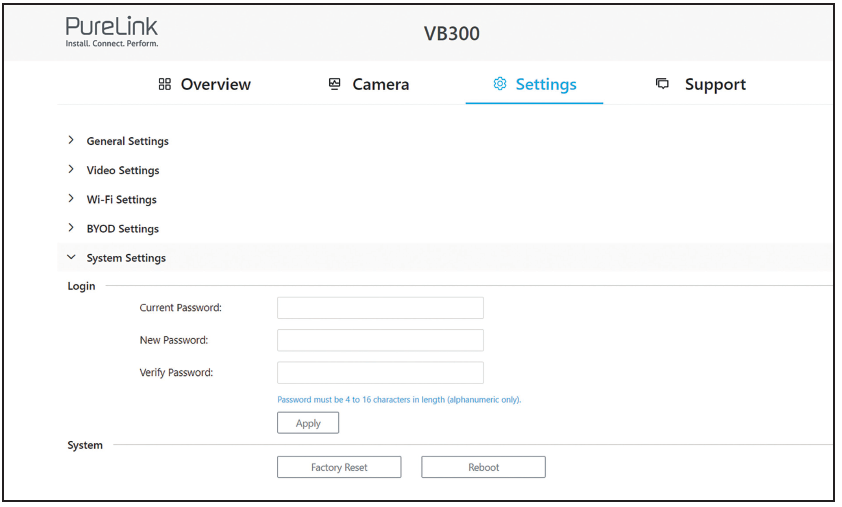
UI ELEMENTS |
DESCRIPTION/OPTIONS |
Login |
Set a new password to login Web UI. |
Apply |
Click to save and perform above settings |
System |
|
SUPPORT
UI ELEMENTS |
DESCRIPTION/OPTIONS |
Device Information |
Displays device model and firmware information. |
Firmware Update |
Select the firmware file and upload it for upgrade. |
Support |
https://www.purelink.de/de/anfrage-formular-purelink.de |
TROUBLE SHOOTING
TROUBLE |
TROUBLE SHOOTING |
The key on remote has no reaction how to resolve? |
Try to replace the battery in remote. |
Press the Home button on remote, the picture of Camera can't return to panorama, how to resolve? |
Please make sure the AI mode is off, this function is only effective in manual mode. |
The HDMI OUT of VB300 no video output, how to check? |
To check if the cables (HDMI IN / HDMI OUT / Type-C) have been plugged properly, re-plug the cables. |
Why can VB300 only output at 720p when using third-party video conferencing apps like Zoom, Microsoft Teams, etc. |
This is due to the limitations of third-party software, like Zoom and Microsoft Teams only support 720p now. |
|
The Camera/Speaker/tic of VB300 can't be recognized or the picture from Camera is abnormal, how to resolve? |
Try using a different USB port on your computer. Try using a different USB cable. |
The audio from Win10/11 system PC is stereo but the Left and Right speaker of VB300 is mono, how to resolve? |
Click Win 10/11 system PC's start button, settings button, select Easy to use, select Audio, set mono audio OFF. |
After connecting a new device to PC, PC's audio doesn't output from VB300, how to resolve? |
Open the settings page of PC, in selecting output device select VB300. |
win+k doesn't work on Windows PC |
Please try to reboot the Windows PC. |
For further support or questions please contact us under https://www.purelink.de/en/anfrage-formular-purelink.de or scan the QR- code below

CE CONFORMITY
 |
PureLink GmbH hereby declares that this product is in compliance with the essential requirements and other relevant provisions of the RED Directive 2014/53/EU and the RoHS Directive 2o11/65/EU amended by 2o15/863/EU. PureLink GmbH hereby declares that this product is in compliance with the essential requirements of the Electromagnetic Compatibility Regulations 2o16 and all other applicable UIF regulations. The EU Declaration of Conformity is available here: www.purelink.de |
DISPOSAL OF DEVICE
 |
WEEE-Reg.-Nr. DE 93847290 According to the European WEEE Directive, electrical and electronic equipment may not be disposed of with household waste. As a consumer, you are obliged to return electrical and electronic equipment free of charge at the end of its service life to the public collection points set up for this purpose or to the point of sale. Details on this are regulated by the respective national law. The symbol on the product, the instructions for use or the packaging refers to these regulations Recycling old appliances in this way is an important contribution to the protection of our environment. |
BATTERY RECYCLING INFORMATION
Batteries and accumulators must not be disposed of in household waste. Please dispose of used batteries and accumulators properly, following local regulations. Consumers in Germany are required by law to take all batteries and accumulators to a collection point in their community/borough or to retailers to have them disposed of in an environmentally friendly way. Otherwise they pose a potential risk to the environment and to human health.
DISCLAIMER OF LIABILITY
PureLink GmbH will not be held liable, nor provide any warranty for damage resulting from improper installation, assembly and use of the product, or failure to observe the operating instructions and/or safety instructions.
TRADEMARK
Product model and logo are trademarks. All other trademarks mentioned in this manual are acknowledged as the property of the trademark owners. No part of this publication may be copied or reproduced without prior written permission of their respetive owners.
|
PureLink GmbH Von-Liebig-Str. 10 D - 48432 Rheine Germany www.purelink.de WEEE-Reg.-No. DE 93 847 290 |
PureLink UK LTD. Carpenter Court, 1 Maple Road Bramhall, Stockport Cheshire SK7 2DH United Kingdom |
V1 | 2023-07 |